9.29.2014

DIY Memo Center - Recycling Flea Market Finds

Do you ever have a vision in your head of some awesome thing you're going to make and when the making part starts happening it becomes apparent that this thing you're DIYing is totally going to blow? Yup. That's been me for like the past two weeks on the memo center adventure. Come along!

You see, way back in July when I met up with some of my blogging BFFs, they thought I was cool enough to enter into their circle of trust (not really, I just thought it kind of sounded like a Fight Club thing if I put it that way) and asked me to participate in a Flea Market Swap. Basically, a bunch of us hit up a thrift store or Goodwill or something of the like and mail our finds to another blogger to see what they come up with.  

I got to send stuff to Charlotte from Ciburbanity and Jen from The Chronicles of Home got to send stuff to me. One day a fluffy manila envelope arrived amid the bills and junk. After explaining to the kids that not all packages can be for them I got to examine my loot. Here were the goods.

Yep. I'm pretty sure that terracotta pot started it's journey south as a whole pot but it appears to have not survived it's trip. Womp, womp. Besides the pot carnage, I got a few really pretty feathers and two packages of some sort of powder (and really cute wrapping, thanks Jen!). Even though the pot arrived broken, I was totally on board with using it that way and thought I could turn it into some sort of cool art thing.

The first idea I had was to frame everything (feathers, broken pot pieces) and sort of make a museum-esq gallery wall kind of deal out of them. I kit up IKEA for a few frames and went to work painting the mattes. I used a spray ink that's been in my craft stash forever but I'd never used before. It was bright yellow and I thought it would look fabulous in my guest room.


Me: "This is going to be awesome!" *spritz, spritz, spritz* "Ummm, maybe it just needs to dry? Keep spritzing..." *spritz, spritz, spritz* Ummmm. Crap.
Yeah, it looked horrible. A little bit like pee and a whole lot not like what I was envisioning. On top of that the mattes were soaked and really not savable (believe me, I tried).

So on to plan B (probably more like plan E, but I'm going to spare you all of the desperate attempts I made to save this thing). I moved onto the big guns and cut new mattes out of 1/4" plywood with a jigsaw. I just traced the frame backs and went to town. Went super quick. 


After they were cut out, I gave them both a quick sanding.


And stained them using Minwax Pre-stain and Wood Finish Cloths. Think wet-wipes soaked in stain :)

I used the Pre-Stain since I had some left over from the dresser project and it makes stain go on really even. 


It just wipes right on and sort of makes the wood a little wet.

Then I applied the stain. And since I couldn't figure out how to take pictures of myself staining whilst my hands were covered in stain, you're just going to have to imagine this part. It involves a hoarded-out hot garage, me in yoga pants, and a 4 year old begging me to help him find lizards.


Once the stain is applied, lean them against your child's bike to dry... like nature intended.


After they were dry, I traced the opening from the old matte on top in a pencil. (note the old matte is no longer yellow... that color is craft fail #2... I spared you the details. You're welcome.)

Then I taped off a boarder and applied glue with a brush in sort of a frame around where the matte opening would have been. My plan was to use the powder like you would glitter (it totally looked like glitter when I peaked in the package) and have it stick to the glue. I wanted crisp sparkle next to the rustic wood.

Houston, we have a problem. When I opened the packets of powder, they looked exactly like glitter. However, upon use, I realized I made a terrible mistake. It was totally more like baby powder and got everywhere... glue or no glue, it coated everything. Just call me Oscar the Grouch hands. While I love the color, I was hoping for a crisp line where I added the glue. That did not happen. It was more like a big smeary blob of shimmery green goodness. What to do, what to do...
I'm going to admit I totally cheated on this part. Like cheater cheater pumpkin eater, cheated. I just sanded off the green and restained the wood a bit. Technically the green powder is still part of the project, you just can't see it :)

Amidts my cheating guilt, I moved on to painting the actual frames. This went off without a hitch. Glam gold spray paint for the rounded corners.


After that I mixed up a little limey yellow green and painted about a third of each matte.


When that was dry, I attempted to arrange the broken pot pieces and feathers into some form of modern art. Seriously, you guys, in my head it was going to be awesome. In real life, not so much. 27 attempts later, I abandoned modern art and the memo center idea was born. :) To achieve memo center greatness, I decided the pot pieces needed to be smaller.
(Either that or I had some pent up frustration.)


Then I sprayed the pot pieces a mix of gold and teal.

I also painted on a little chalkboard paint and added smaller mattes from old frames with hot glue. (You can still see the green in this picture!) Then most of the feathers got turned into feather pens with a little hot glue and twine.

I used the tiny painted pot pieces like jewelry. I actually really love this "gem" from the stash glued on top of a screw to hold the pen on.

And there you have it. A semi recycled, almost craft fail, totally modern chic memo center. Even after epic fail after epic fail, it looks really great in our office.

My kids keep calling the pens, Harry Potter pens :)

So what flea market finds have you saved? Show us! Add your project below to the link up and enjoy the fun. I can't wait to see what you've made.


9.16.2014

Easy Way to Update Old Decor with Paint

This is a sponsored post on behalf of Plaid and FolkArt Paint and Stencils. All opinions are my own.
Ughhhh. I'm in a funk again. A house-decorating, ready-to-move-on funk. Can you tell? We moved into this house two years ago with the plan being to build our new forever home and get outta here as soon as possible. It has always been temporary, but I still made an effort to make it feel like ours at the beginning. However, now that we're nearing the home stretch, and the tiniest glimmer of light is starting to shine through that tunnel, finding motivation to do anything with this place is almost impossible. The master bedroom has been my pain point lately. I really want to redo it but it's really hard to spend money on a room when you know you're moving in less than a year (7 months if we're lucky). In an effort to lift my funk and start the bedroom transformation, I started simply and updated a vase using FolkArt Stencils & Paints.
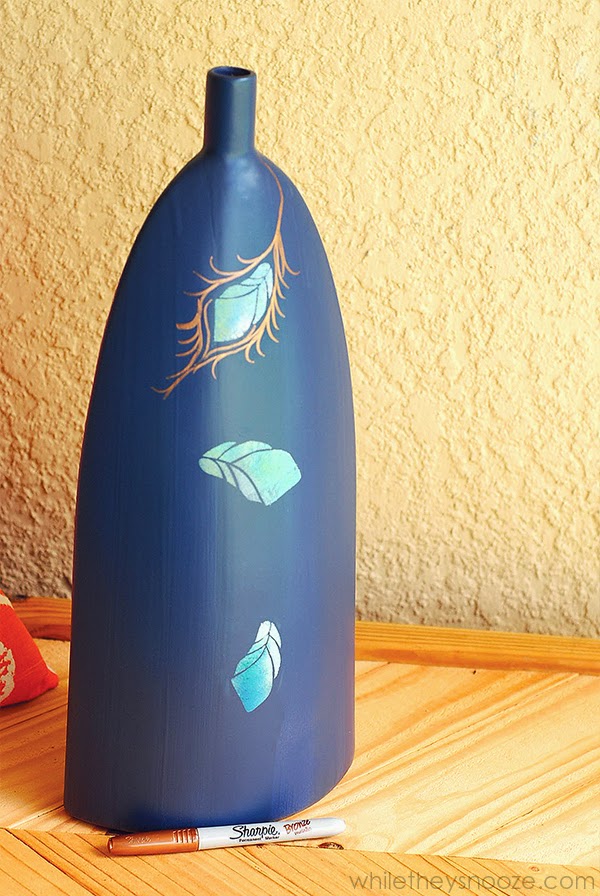
This vase has been in our bedroom/bathroom for years now. It's not all that terrible as-is but it's rather earthy for my current taste. It looked fabulous I tell you back in 2006 when pea soup green and beige were all the hotness. Unfortunately, it just doesn't jive with the navy blue, teal, gray, gold glam vision in my head of our future bedroom. Time to transform.

Supplies:

Step 1:
First I spray painted my vase to make the entire thing a dusty navy color. 


Step 2:
Next, I applied FolkArt Stencil Adhesive to the back of a flower stencil. While the flowers were cute, I really loved how the leaves looked more like feathers to me so I focused on them. And since it's reusable, the flowers may end up in a project for my daughter's room one day.

I applied the glue just around the leaves and waited a few minutes for it to get tacky. 

Then I stuck the stencil right to the vase. It held really well and was easy to reposition when I was figuring out where I wanted my "feathers".

Step 3:
Paint. The FolkArt Stencil Creme is oil based which I found both good and bad. Its really easy to blend and mix which gave me some nice effects. It also dries really slowly so it was a snap to wipe off if I got a smudge or something. On the other hand, the fact that the paint stayed wet so long made it hard to reposition the stencil and add more "feathers" over the ones I just painted. I had to be really careful but if you don't reposition the stencil at all, it's easy peasy.

I used a mix of blue, white, and yellow with a really stiff brush. I also blended on a paper plate before I painted on the vase.

And it looked like this when all 3 were done. Nice and crisp thanks to the adhesive.

Step 4:
Embellish with metallics. I used a copper and silver Sharpie to add to the design but you could also use paint or even another stencil. I just love the way metallic anything looks on navy. Brass or copper studs would look really nice too.

And tada! It might be a small thing, but it's a step in the right direction. Besides helping to move my bedroom from beige and green blah, I've also reused something I already had. You know I puffy heart recycling and cheap. :) I just might have the slightest urge to redo the headboard now. I said might.

For more inspiration and ideas, follow along with Plaid.

9.02.2014

DIY Sharpie Fabric Bulletin Boards

This shop is part of a social shopper marketing insight campaign with Pollinate Media Group® and Office Depot, but all my opinions are my own. #pmedia #inspirestudents http://my-disclosur.es/OBsstV
Be honest. How many piles of school projects, and papers, and drawings do have stacked on your kitchen counters right now? I'm saying I have at least 3 rotating piles right now. One pile is the "to keep" art projects. You know, the sentimental stuff–hand prints, the I-love-you-Mommy projects, the newest family portrait brought home. Another is the "some action required pile". The stuff I have to read/sign/return. And the last pile is the "let's keep it long enough so the kids forget about it and I can throw it out" pile. It's true. How many half-colored, ripped-out pages of Anna and Elsa does one family need? In an effort to rein in the back-to-school clutter, I got inspired while shopping at Office Max for supplies, and decided to reallocate a little of it to my son's room. 

As I've mentioned before, my son has bunk beds. The beds came with two cork boards and a dry erase board just under the top bunk. Great idea except he was two when he got these beds and well... I guess the distinction between dry erase and cork just wasn't there.


The cork part was pretty much completely "decorated" on each side (there is another board to the left of the dry erase board in the middle). On top of that, the cork part was so thin that a thumb tack wouldn't stick in it. And certainly not if you were trying to tack a piece of paper up. So really, the cork boards were just colored-on eye sores that served no purpose.

For the last year or so I've been debating re-doing these bunk beds totally. I'd really love to paint them but the work involved in that it a little daunting right now. So I decided to start small and redo the cork boards since they served no purpose currently and were really ugly. Here's a panoramic via iPhone so you can see the whole deal. 


Supplies:
I purchased the majority of my supplies at Office Max and right now you can save $5 off your purchase of $20 or more on Select Newell Rubbermaid Brands (PaperMate, Expo Neon Window Markers, Sharpie, Uni-Ball, & Mr. Sketch) while supplies last. I'm all for a deal.
  • Cardboard
  • Fabric
  • Hot Glue
  • Sharpies
  • Ruler
  • Cork Rolls
  • Scissors


Step 1:
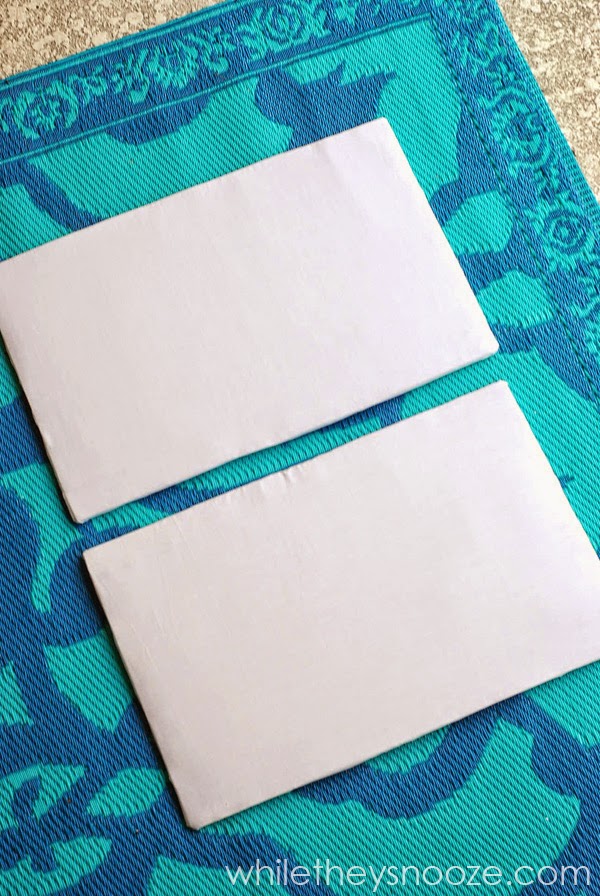
First, I cut two pieces of scrap cardboard out of a box we had in the garage. I cut them to fit just inside the frame of each cork board. Then I covered each piece of cardboard in cork.
A roll of cork is pretty readily available and cheap. I just hot glued it to the cardboard.

Step 2:
Cover each cork-covered piece of cardboard in fabric.The fabric is just wrapped around the back and hot glued in place. I chose a plain white so I could make my own design with the Sharpies.

Step 3:
Sketch out (or print from the internet) a simple geometric print you'd like to recreate. I wanted a simple triangle pattern and planned it out a little first.
Then I measured out a grid on my fabric in pencil. 
And began drawing my lines with the Neon Sharpies. You could do this before the fabric was attached to the cardboard/cork but I think it would be much harder to keep the fabric from shifting.
I really loved how bright the orange came out.
Then I did a dot at each intersection with a Sharpie marker made for fabric. Honestly I really can't tell the difference for this application, but I guess if it were something you were going to wash, the fabric marker would hold up better. I love how crisp and modern it looks!

Step 4:
Pop in your new bulletin boards and kick yourself for not doing this sooner. I didn't actually attach the new boards to the bed because they fit in the frame so tightly you really have to work to get them out. If they were a little floppy I would probably use some sticky Velcro to keep them in place.

And yeahhhh.... you might have noticed I painted the frame of the bed in that area. I couldn't help myself. It's the same blue I used on his suitcase table and I just love it. It ties everything in so nicely now and that's one less piece I have to paint later on when I redo the entire bed. :)

So now I have a place to pin up some school art projects rather than letting them sit in one of my piles on our kitchen counter. He's already moved everything around and added his favorite masterpieces. I've also provided him with some new Neon Expo dry erase markers for his board and if those end up on the bulletin board panels... it's as simple as popping it out and recovering again.

So hurry off to Office Max for some last minute back to school shopping. Weekly savings from August 31st through September 6th: Sharpie Clearview Highlighter 3PK:  $4, PaperMate Clearpoint 2PK’s:  $3, Select Expo Chisel & Ultra Fine 4PK’s:  $2 while supplies last. What back to school projects do you have in mind?