

Navy, gray, and gold... with pops of teal. I've been planning our master bedroom in my head for months now. A few weeks ago I posted the duvet cover I bought in a post-Christmas stupor from Urban Outfitters on Instagram. Did you know they sell house stuff? I didn't until recently and find it way better than their, ahem, clothes. Anyway, it's navy and on backorder until February (booooo!). So, while I patiently wait for the thing, I decided to recover the two pillows that have been on our bed forever so they'd jive if it ever arrives. That's a lie... they're only on the bed when we make the bed which is like 4 times a month. It's really like, the pillows that are always on the floor in the corner.
Here's what they looked like before. Brown with white waves on one side and white with brown waves on the other. Totally not good with my soon-to-be navy loveliness.

They first made an appearance way back in one of my first blog posts when I made our duvet cover in our old house. Aww, memories (and bad photography). Very beige and brown.

Time for a change! Let's get started. Follow along and make your own.
Step 1:
Figure out what size your pillows will be.
I took the old covers off the old pillows and measured. Super easy. They were 26" square so I added a couple inches for seams and mess-ups and cut my fabric 28" square. To make two pillows you'll need 4 squares of fabric (2 fronts and 2 backs).

I chose a bright blue and green ikat for the fronts and leftover fabric from the curtains I made for our bedroom on the back. This way I can flip them over if I get tired of one side.

Step 2(ish):
Iron your squares.
You could probably do this later or you might not need to do it at all if your fabric isn't wrinkly but mine was pretty bad so I pressed 'em a bit.

Step 3:
Figure out where your zipper is going to go.
This is what the zipper looks like in the package. Pick one that's about 4" to 6" smaller than the width of your pillow. This is a 22" zipper for a 26" pillow.


The zipper goes at the bottom of the pillow. So, put your two squares of fabric together, right sides together. If your fabric has a pattern, make sure you've got it going the direction you want it to go. Then lay your zipper on top of the two squares of fabric, at the bottom of the pillow, a couple inches from the edge. Like this. Center the zipper between the two sides.

We're not attaching the zipper yet, we're just using it to measure right now. Place a pin just inside the metal stops on both sides of the zipper. Don't pin the zipper yet, just the two layers of fabric.

Here's the other side. Pin placed just inside the metal stop.

Sew the little space outside of the pins.
My seam allowance is 1 inch so I sewed from the pin toward the edge of the fabric, 1" in from the edge. Like this. Backstitch at the start and stop of this little seam so it stays put.

Do the other side the exact same way.

Step 5:
Sew the space between the pins.
We just did the little space outside of the pins (I marked the pins in pink), now you're going to connect those two seams. This time however, increase the stitch length all the way on your machine and don't backstitch. We want this seam to come out easily. (Just pretend that line is really straight.) When you're done with this, remember to put your stitch length back to normal for the rest of the project.

Step 6:
Press that seam open.
Now that the bottom of your pillow is sewn together, press that seam open flat. Like this.

Step 7:
Attach the zipper (with pins)
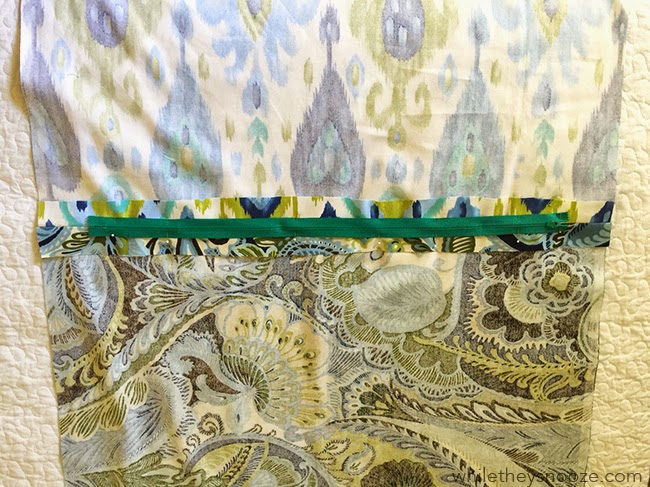
Now, with the pillow squares still laying open flat, place the zipper right on top of that seam you just pressed open. The zipper should be face down. Like this.

Make sure it's in the center and pin it in place.
Step 8:
Sew the zipper!
To do this you'll need a zipper foot. This is what mine looks like. It's skinny. Like half the size of the other foots.

A zipper foot has two sides. A left and right. If you're sewing on the left side of the zipper (like I am in this picture) the foot is over to the left. That way the needle comes down on the right side of the foot so you can sew right up next to the zipper. Like this.

Just sew all the way down one side ending at the zipper pull. Not gonna lie, this is the tricky part. Once you get here, you're going to run into the pull. To get it out of the way, take whatever pins that are in the way out, raise your presser foot (keep the needle down), and shimmy the zipper pull back behind the needle.

I used the end of a small paint brush to shove it back since my giant man-fingers would't fit. Once you get it behind the needle, continue sewing to the end. Remember to backstitch to keep everything together.

Now swap your foot over (this takes a second... check your manual, it should pop right on and off really easily) and sew the other side of the zipper. In this case I'm sewing down the right so my foot is moved over to the right so the needle comes down close to the right side of the zipper teeth.

Step 9:
Pick open your zipper.
Grab your seam ripper and pick open the loose basting stitch we added between the the pins earlier. It should come out really quickly and your zipper will appear as if by magic. Notice my not-so-stellar sewing job there. Whatevs! It doesn't have to be perfect to work! :)

Step 10:
Sew up the other 3 sides.
Before you do this, open the zipper! If you don't, you won't be able to flip your pillow right side out. (Been there, done that) Well, you might be able to shimmy the zipper open but it won't be easy. Trust me. You're totally almost done! Once the remaining three sides are sewn up as normal, clip the corners diagonally (so there's not a ton of fabric jammed up in the corners preventing a nice crisp edge). Then, flip the whole thing right side out and YOU'RE DONE!
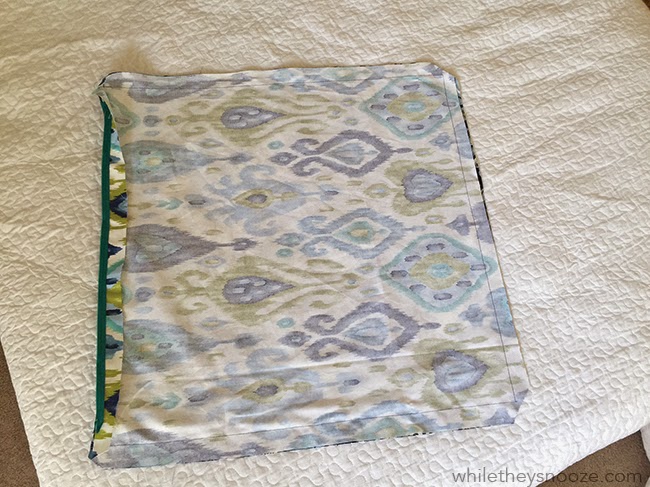
Now stuff those old cruddy pillows inside and admire your zipper handiwork. :)

I just love that they look so much more fresh and cheery than the brown ones did. If you're wondering, I took these pictures in the guest room since the master bedroom's light sucks and the new duvet is still in internet backorder land.

New pillow front.

New pillow back.

So instead of buying whole new pillows or paying some store too much for their covers, I hope you'll try to make your own! Let me know how it goes and I'll let you know if my duvet ever arrives. :)

You make it look so easy!! I'll have to try this I'd like to make the pillowcases for our duvet set I'm making with zippers. They look beautiful! Love the fabric you chose.
ReplyDeleteHi Katie. Thanks! I made three for my couch last year the same way and the first one always takes the longest. After that, I can whip em out. haha Same thing happened this round. I made the first one alone to remember what I was doing, then blogged the 2nd one. My sewing is never straight either but the zipper works! That's what's important, right? :)
DeleteHi there, great pillows! What's the ikat fabric you used, do you remember? It's EXACTLY what I'm looking for for some curtains in our spare room / office! Thanks!
ReplyDeleteGah! I cannot find the info anywhere. I bought that over a year ago at JoAnn's I think in the outdoor section. From some feverish goggling just now I found "Richloom Django Ikat" which is the same pattern but I can't find the same colors exactly. Here's a link from Online Fabric Store too. https://www.onlinefabricstore.net/HSearchResult.aspx?keyword=django Maybe ebay will give you luck? Or maybe they'll come out with the brighter colors again as summer gets closer. :/ Good luck!
DeleteGood collection ikat fabric pillows which looks really very impressive. Your choice of color combination is appreciable.Great Blog.........
ReplyDelete